


%20(1).avif)


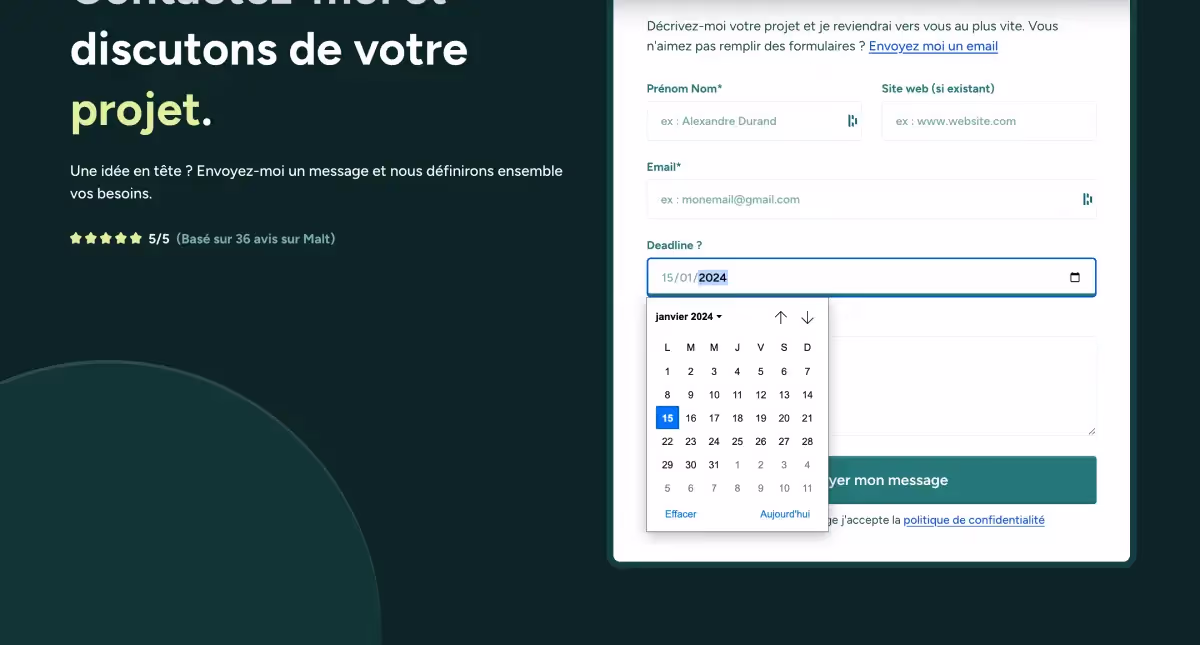
Webflow now natively supports adding a date picker to forms, a feature that was previously unavailable. This UX component simplifies bookings, event registrations, and appointment scheduling by offering fast and error-free date selection for both visitors and site owners.
What is a date picker and what can you use it for?
Add a date picker to your form could be suitable for you when you want to give the possibility to your users to interact via a time unit. Several use cases arise such as:
- Online bookings : In the reservation forms for hotels, flights, restaurants or events, a Date picker allows users to easily select the date of their reservation. This simplifies the booking process by offering an intuitive interface.
- Event registrations : For registrations for events, workshops, courses, or seminars, a date picker helps participants select the date of the event they want to attend.
- Making an appointment : This facilitates planning for both parties and ensures better management of everyone's calendar (e.g.: Booking a time slot via Calendly for example)
The date selector is therefore a key UX component allowing quick and error-free selection both for the visitor and for the owner of the website.
How to easily add it to your Webflow site?
If you wanted to do a date picker on Webflow a few weeks ago it was unfortunately not possible. But it has now been possible recently! Let's find out together how we can create this module.
Step 1: Use the brand new “custom element” (DOM)
So go to your designer and then add the module”Custom Element“. You can find it via the Advanced panel or directly via the search shortcut (CMD+K):
.avif)
Simply add it to the DIV or the form in which you want your selector to appear and let's go to the next step.
Step 2: Add the DOM so that it becomes a date picker
At this point, you'll only see a simple DIV. This is where things get interesting. This element is not only used as a date picker but for a lot of other things.. Webflow offers us the possibility to modify this block by giving it a lot of functionalities/tags (table, password, range slider...) But we'll look at these other options in a future post.
.avif)
- In your Custom Element click on “Settings”
- Adapt the tag for “input”
- Add a type="date” attribute
You will find that the block comes to life instantly and is transformed into a native and intuitive date picker!
Step 3: Style it to match the rest of your site
Don't forget to add the class corresponding to the other elements of your form or give it a unique CSS style thanks to the quick customization that Webflow offers you.
If you want to know more about Webflow, do not hesitate to consult my article where I explain Why do I consider it the best CMS


